


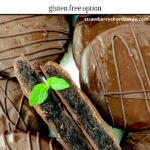
They’re thin.. they’re minty.. they’re bursting with rich, dark chocolate flavor. They’re Vegan Thin Mint Cookies! AKA everyone’s favorite Girl Scout cookie, but now vegan and gluten free!

Like many other cookie-loving little girls out there, I joined the Girl Scouts when I was in elementary school. I spent less than one year doing it. In that time I went through a cookie selling season, and had an astute observation as a 7 year old – those Thin Mint cookies were a big hit. That’s where I made most of my sales, and as a very picky child I liked few foods but chocolate was one of them, so I gave them a try. Who knew this simple decision would set off a multi-decade obsession with these perfect cookie patties.
I know it is blasphemous to say I like these homemade vegan thin mint cookies more, so I won’t technically say that. But what I WILL say is – I love being able to control the amount of mint that goes into the dough. I love being able to control the amount of melted chocolate coating that envelops each cookie. I love that they are a little bigger than the traditional ones, so you get more bang for your cookie buck.
Also if you are obsessed with Thin Mint flavors as I am, make sure to try my Vegan Thin Mint Donut recipe next!
Enough rambling, it’s Girl Scout Cookie Time.
How To Make Them:
Warning – these cookies need some chill time! Only 30 minutes, but mentally prepare yourself for 30 minutes of staring at your fridge begging it to work faster.
Start by creaming together the vegan butter with brown sugar, granulated sugar, maple syrup, and peppermint extract. I use 1 tsp of peppermint extract here – and we will use more later in the melted chocolate coating – but certainly feel free to adjust up or down based on your taste buds.
Next you will add in a mixture of gluten free flour, Dutch cocoa powder, baking soda, and salt. If you do not have Dutch cocoa you can swap for regular cocoa powder and they will cook correctly, but the Dutch cocoa is what gives it the authentic Thin Mint flavor, so I’d highly recommend using it. If you haven’t used Dutch cocoa powder before and can’t find it at your local market, this is my favorite brand.
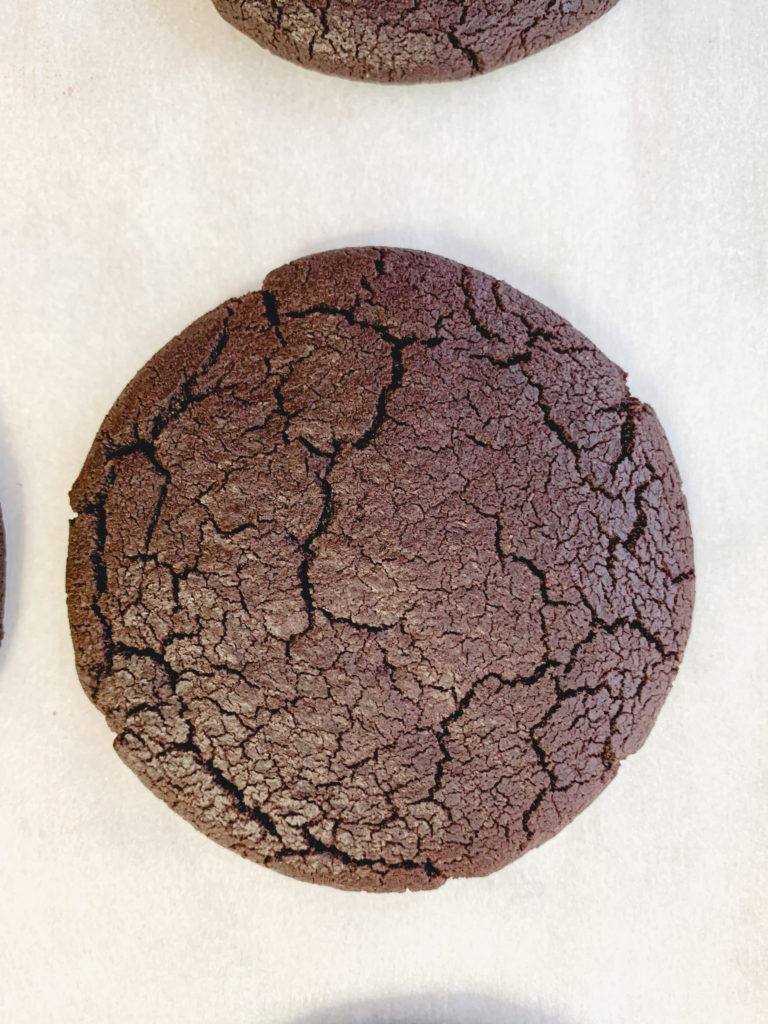
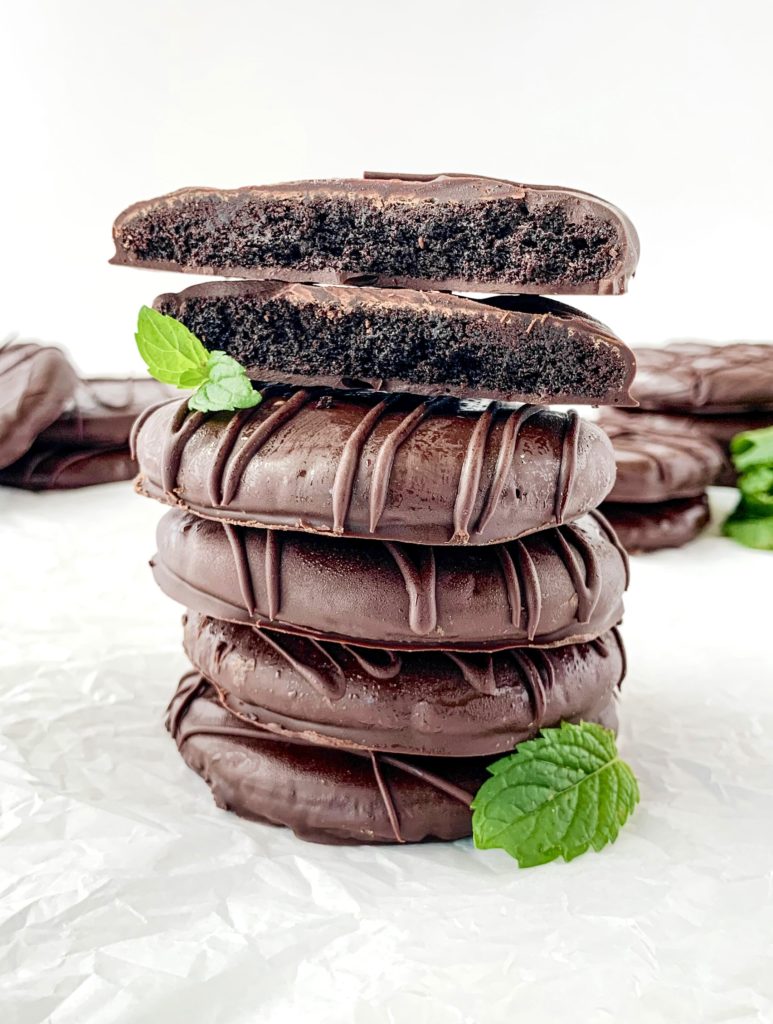
The dough will be very sticky and to be frank I did not post a photo of it here because it looks.. not pretty. If this sounds familiar, you’re on the right track. Cover the bowl and chill the dough in the fridge for 30 minutes. Once chilled, scoop out 1.5-tbsp sized balls, you should get around 17-18. Roll each into a ball, then flatten either with your hands, or pressing a glass down onto them. Each disc should be around 2 inches in diameter. If you’ve been working with them for a while to get the size and shape right, put back into the fridge for another 10 minutes to make sure they’re chilled before they go in the oven.
Once they are chilled discs, move onto a parchment lined pan and pop in the oven for 10 minutes. They will continue cooking once they are out, so let them stay on the pan for 10-15 minutes before moving to a cooling rack to cool completely.

Making the coating!
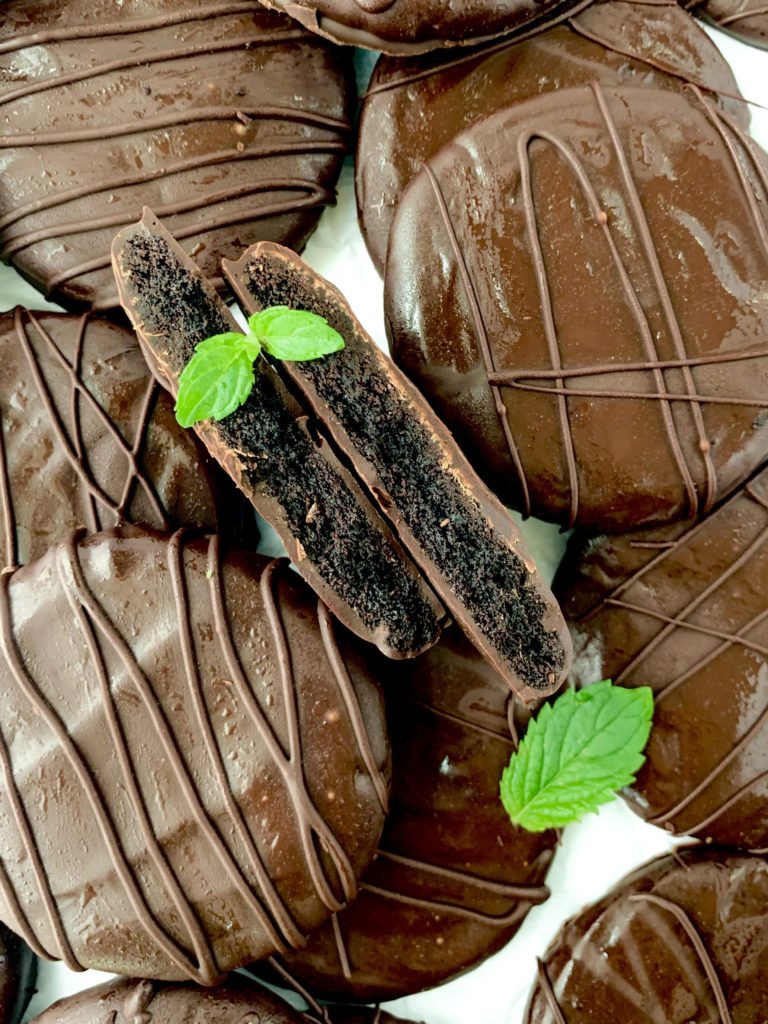
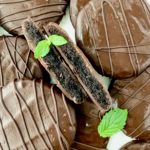
While cooling, it’s time to make the melted chocolate coating. You may want to use more or less melted chocolate here depending on how much you use. I cover the entire cookie with chocolate, AND then drizzle more on after as you can see in the photos. You may prefer just to put some on the top of each cookie like icing. The amounts I’ve used here are for my way and leave you with a little extra so you’re not scraping the bowl at the end.
Melt 12oz of chocolate (this equals a little under 2 cups if you’re using chocolate chips) either on a double boiler or in the microwave. Then add 2 tsp of neutral oil – this will help make it smoother for coating the cookies – and 2 tsp of peppermint extract. Again, you can alter the amount of peppermint extract to your taste buds.
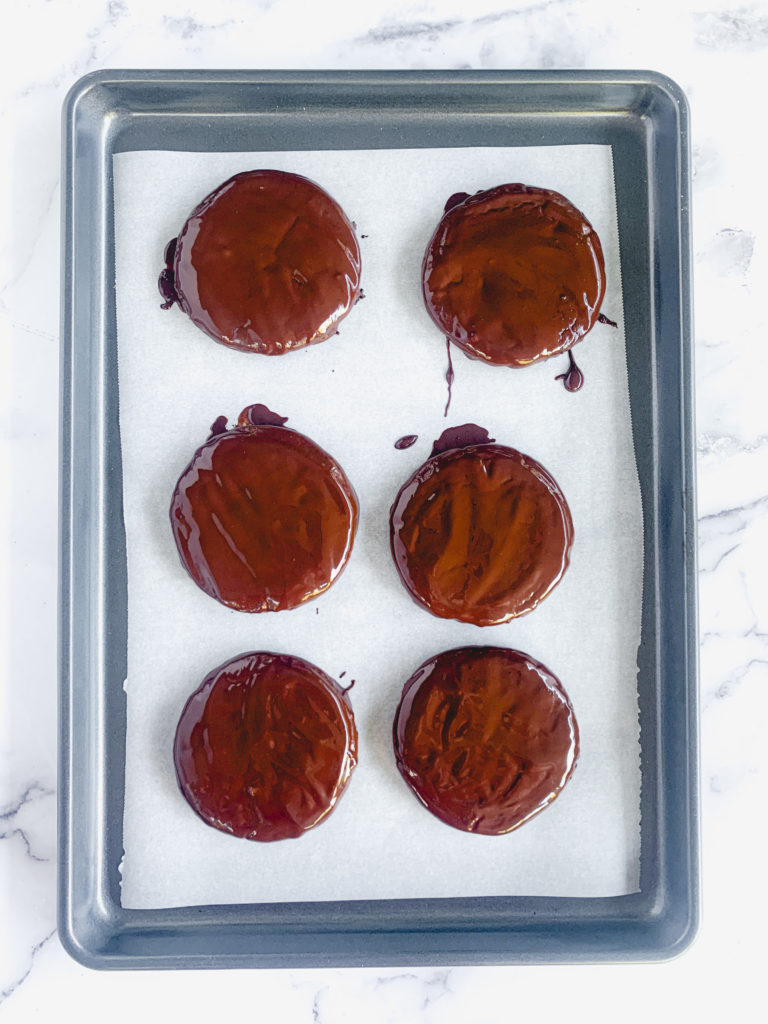
I cover the entire cookie in the mixture, which you can do either by resting the cookie on two forks and dipping it into the bowl, or you can be like me and just use your hands because that’s more fun anyway. Once each cookie is coated, put it back on the parchment paper and then move them all to the freezer to set. If you want to make swirls on top with extra chocolate like I did, let the first layer of coating set in the freezer, then add the swirls on top after then freeze again.
I actually think these cookies taste best straight from the freezer anyway, so I store mine there even when they’re all finished. And that’s it! Time to eat your vegan thin mint cookies!!!
Storage:
I keep these vegan thin mint cookies in the freezer, as that’s the best way to keep the chocolate coating in place, and also they taste the best that way! If you keep them sealed in an air tight container in the freezer, they should last a few months.

Pro Tips & Tools:
- Make sure you are measuring your flour either by weight or using the spoon and level method. Do not scoop directly from the container, as you will wind up with too much! This is so important! If you want to buy a pre-made gluten free flour blend, make sure it’s King Arthur’s Measure for Measure Gluten Free Flour, it is BY FAR the best one for my recipes, NOT Bob’s Red Mills or any others. If you want to make a homemade blend, here is a link to the one I use.
- Make your life easier when you are measuring out the dough and spring for a trigger scooper.
- This tip goes for all cookie recipes – if it is your first time trying a new cookie recipe, if you have the time, I always suggest baking one cookie first before putting the full batch in the oven. That way if something is not working right for your batch, you can adjust before you’ve wasted all the dough. If it spreads too much, adding a little more flour is usually a safe fix. If it’s too dry and not spreading at all, it may need some more liquid ingredients, in this case a bit more maple syrup or even a few drops of non-dairy milk.
Ingredients Needed:
- Vegan butter – softened enough to work with. I use Earth Balance sticks.
- Granulated sugar and light brown sugar – the mixture of both of these is what’s needed to mimic the original cookie. I wouldn’t recommend leaving out the brown sugar, but if you want to cut back on your sugar intake, I love using this Monkfruit Sweetener in place of the granulated sugar.
- Maple syrup
- Peppermint extract
- Flour – Make sure you are measuring your flour either by weight or using the spoon and level method. Do not scoop directly from the container, as you will wind up with too much! This is so important! If you want to buy a pre-made gluten free flour blend, make sure it’s King Arthur’s Measure for Measure Gluten Free Flour, it is BY FAR the best one for my recipes, NOT Bob’s Red Mills or any others. If you want to make a homemade blend, here is a link to the one I use.
- Dutch Cocoa powder – Dutch cocoa powder specifically is what gives these cookies the authentic taste. If you cannot find any at your local market, this is my favorite brand. If you swap for regular cocoa powder the cookies will bake well, but they will not taste like the Thin Mints you are used to.
- Baking soda
- Salt
- Chocolate bars or chips – to use for the melted chocolate coating. Make sure these are vegan! These are my go-to bars for melting chocolate, and these are my go-to vegan chocolate chips for all things.
- Neutral oil – this is to help thin out the melted chocolate to help the coating process. You can use coconut oil here if you’d prefer.
What To Bake Next:
- Want more copycats of old favorites? First you MUST try the Donut version of these Thin Mints. Then try these Vegan Copycat Entenmann’s Donuts, or these Vegan Copycat Levain Cookies.
- Want more chocolate on chocolate? Try this Vegan Chocolate Cake with Salted Caramel Frosting, or these Vegan Fudgy Brownie Cookies, or these Vegan S’mores Cupcakes.
- Want more cookie recipes? Try these Vegan Brown Butter Chocolate Chip Cookies, or these Vegan Peanut Butter Chocolate Chunk Cookies.
Vegan Thin Mint Cookies (Gluten Free option)
Ingredients
Cookie Ingredients
- ½ cup vegan butter softened, at room temperature
- ¼ cup light brown sugar
- ¼ cup granulated sugar *if you want a sugar free option, this links to my favorite sweetener, you can substitute it 1:1 in place of regular granulated sugar
- 6 tbsp maple syrup
- 1 tsp peppermint extract
- 1 cup gluten free flour can sub all-purpose if desired. This links to my favorite store bought gluten free flour blend that works best with all of my recipes, or see "Ingredients Needed" section for further info.
- 2/3 cup Dutch cocoa powder see notes
- 1 tsp baking soda
- ¼ tsp salt
Chocolate Coating Ingredients
- 12 oz chocolate just under 2 cups if you are using chips instead of bars
- 2 tsp neutral oil
- 2 tsp peppermint extract
Instructions
- Mix together the gluten free flour, Dutch cocoa powder, baking soda, and salt in a bowl and set aside.
- In a large bowl, cream together the vegan butter, brown sugar, and granulated sugar. Then add in the maple syrup and peppermint extract. Finally mix in the dry ingredients. The dough will be very sticky. Cover the bowl and move to the fridge for 30 minutes.
- Pre-heat your oven to 350°F and line a pan with parchment paper. After 30 minutes of chilling, remove from the fridge.
- Scoop 1.5 tbsp sized balls from the dough, this will get you 17-18 cookies. Flatten each one to a disc that is 2 inches across. If the dough has warmed up by now, pop the discs back into the fridge for another 10 minutes to chill again.
- Move the chilled dough discs onto the parchment lined pan. Bake for 10 minutes.
- The cookies will continue to bake after coming out, so let them stay on the pan for 10-15 minutes before moving to a cooling rack to cool completely.
- During this time, make the chocolate coating by melting the chocolate either on a double boiler or in the microwave, then adding the neutral oil to thin it out a bit, and the peppermint extract. Note – I use this amount to generously coat each cookie completely, and then decorate the tops. You can cut the amount down if you want less coating.
- When the cookies are fully cooled, cover them with the melted chocolate, then move back to parchment paper and let them set in the freezer. If you want to make swirls on top like I did in the photos, let the first layer of melted chocolate set first in the freezer before drizzling the swirls on top then putting back into the freezer.
- Eat and enjoy!
Notes
- If you do not have Dutch cocoa powder, you can use regular, but the taste will not be as authentic to the original cookie.